
I suck at craft. I can’t cut straight with a razor or a saw, and get a cut square? Forgetaboutit. I’ve got a Kreg square cut, and that helps a lot. It works a treat when I need to cut a 2-by with a substantial length on each side, or for a short plywood cut. However, it’s useless for small pieces, and it’s often cumbersome because you need to hold it carefully with the left hand while managing the saw with the right. Awkward can be scary when a circular saw is involved.
Crucially, I don’t have a table saw. Ok, I do have a teensy-tiny NovelLife Mini Hobby Saw, and it’s really great. I’ve managed to cut soft wood up to 1/2" and plywood up to 5/8", but very very slowly. It chokes a lot, and the table is only 9" deep. It’s a great tool, and I’ve learned a ton using it, but it’s usable only for the smallest stuff. I’m going to burn it up with overuse in the not too distant future, I suspect. All to say that to cut real lumber, I’m pretty much limited to my circular saw.
After much review on YouTube, I decided to make a crosscut jig. The idea is that the circular saw sits in metal tracks which make sure it cuts straight. Then mount a board square to the tracks. Wood to be cut goes against the square board, and even I should be able to get a square cut. Here we go.
First thing is to build a table for it. I used a scrap of 5/8" plywood onto which I glued a sheet of hardboard. On top of that I glued and screwed 2x4s to hold everything together. In the photo, I’m waiting for all the glue to set.
Then I need rails. I had some 1/2" steel L rods from another project (that totally didn’t work out), so I cut them with a dremel (dramatic sparks!) and drilled holes to mount them onto the 2x4s.

I mounted the rails to the 2x4s and found that the clearance underneath them was a little too tight to cut 2-by lumber. So I pulled the rails off and added a 1/4" layer of plywood between the rails and the 2x4s.
Then I found that I really need the whole run of the rails, and it wasn’t quite long enough. The screws securing the rails were in the way of the saw’s bed. I pulled the screws out again, countersunk them with a 3/8" carbide bit (man, carbide bits just eat steel, pretty cool). Then I reset the rails, adding wood glue to the screws so they’ll adhere to the somewhat-stripped holes. Now the saw bed can run smoothly over the screws.
After I got the fence in place, I ran the saw back and forth, scoring the hardboard. I found that the saw can’t quite go to it’s maximum depth because the motor housing bumps into the rail, so I lose the last 1/4" or so of the saw’s possible depth. Ideally the rails would be 3/8", not 1/2", but, well, I had the 1/2" steel, so there we are. The saw cuts into the hardboard about 1/16", so it’s just barely enough to cut a board cleanly.
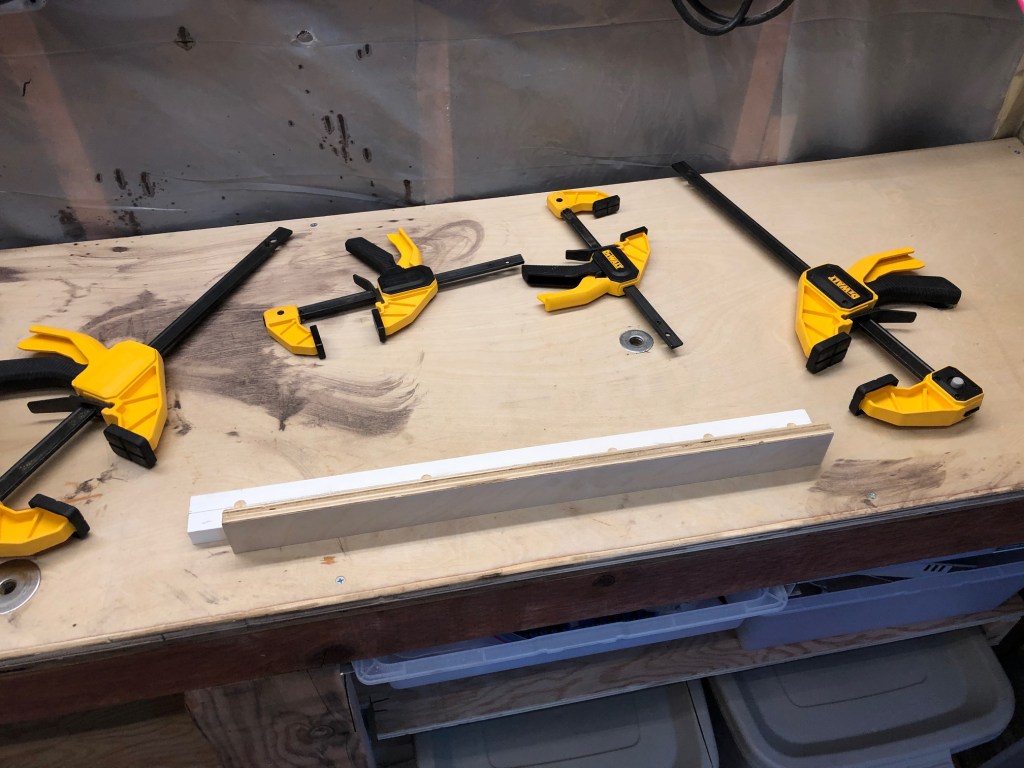
Next I need a fence. After several fails, I used a poplar 1×2, and glued a piece of finished 1/2" plywood onto it. The plywood will be the fence, so it needs to be both flat and square to the vertical. I drilled and countersunk pilot holes in the poplar to affix it to the table.
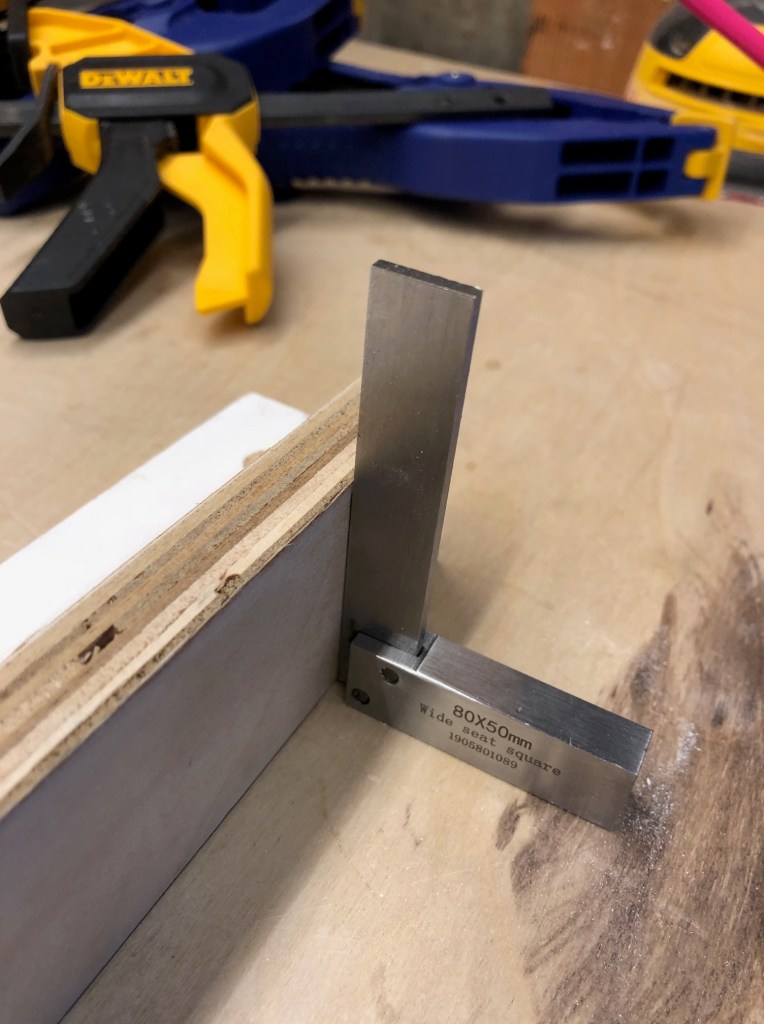
Finally I squared the fence to the cuts previously I made in the hardboard. I glued it and then set it with a bunch of screws, very carefully checking the square many times.
And it works! Yay! A little less craft-personship will be needed from here on. The rails need to be rubbed down with steel wool and then oiled, but that’s just maintenance.
