
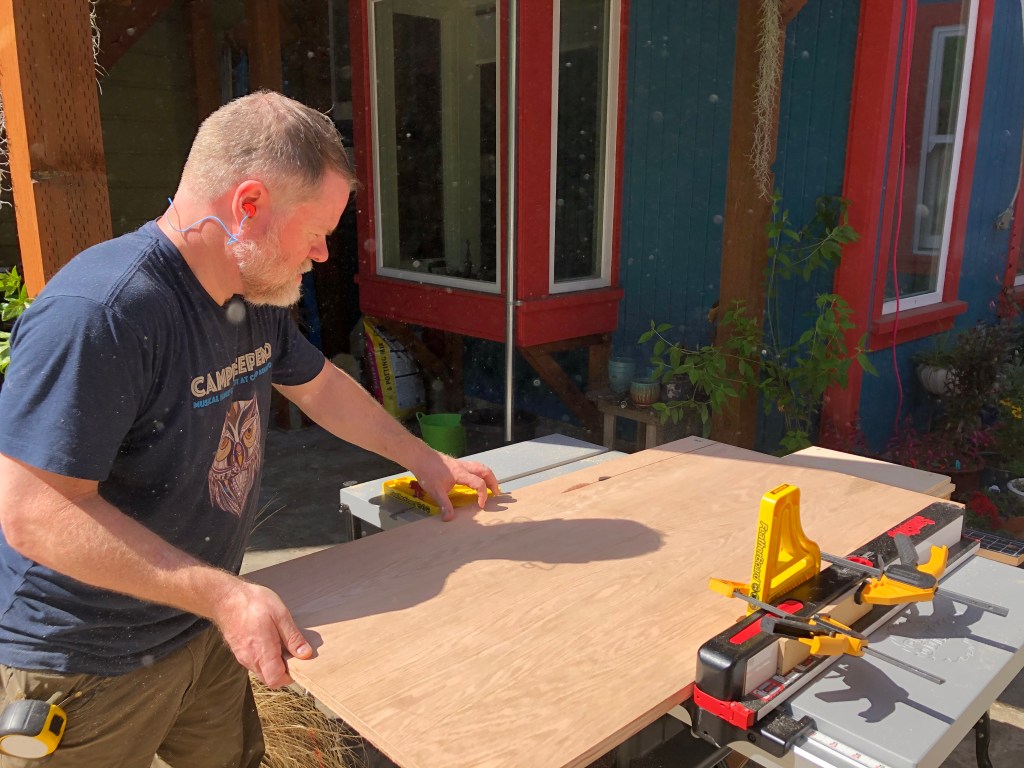
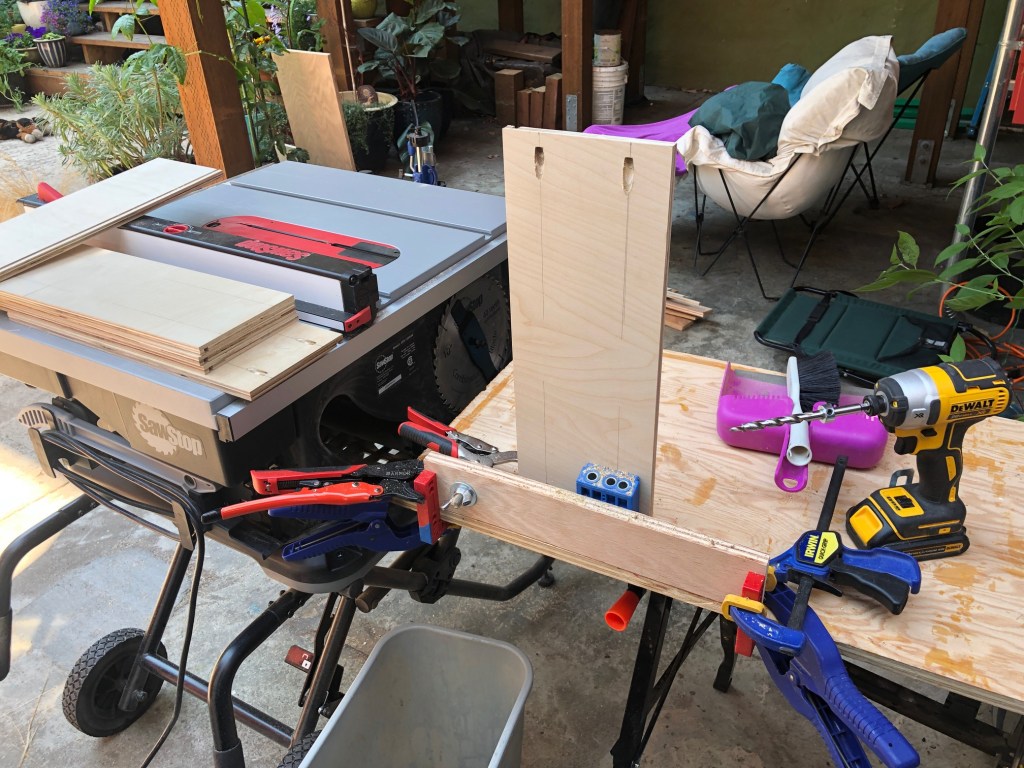
So if there’s a saw, there needs to be a lot of cutting. That’s my theory, anyway, now that I have a fancy new saw. My lab + shop are together 95 square feet, so space is seriously tight. There’s a space 31"T x 33"W x 22"D that could hold more if there were an orderly way to put stuff there. This is new for me, I’ve never built drawers before. Here’s the space with a cabinet frame and a 11-week-old, 14-lbs puppy for perspective.

The key issue that’s motivating this where to put fasteners: bolts, screws, nuts, washers, yes, imperial and metric, but also t-nuts, standoffs, inserts and other tiny bits. Plus drill and router bits. Adam Savage famously stores all the little pieces with the Sortimo system, but the Sortimo boxes are like $65 each, and in Adam’s system, you have to pull the whole box out and put it somewhere in order to dig around looking for some tiny thing.
I don’t think I need the 20-odd boxes Adam has, probably 4-5 would so it. The Stanley organizer box isn’t quite the build quality of the Sortimo but it’s good enough.
And where to put the box when I pull it out of the rack? This turns out to be key. My shop’s flat spaces are always cluttered, and sure, I should get better at not leaving clutter, but practically, a self-supporting drawer would reduce how much I have to pull the boxes in and out. It would be efficient to open a drawer and putter in the drawer without pulling out the box.
After much drawing, I decided to build 7 drawers in the left column, each xx"W x 3 1/4"T, and 4 drawers in the right column each xx"W x 6 1/2"T. I figured I’d just make butt joints, so the measurements were pretty easy. However, the plywood comes in 4×8′ sheets, and I only have a Toyota Camry sedan. I tried to estimate all the pre-cuts so that I could cut the plywood into useful sizes that would fit into the car at the lumber yard. Needless to say, this was extremely wasteful. I cut a lot of pieces to the wrong size and lost wood, but even more, I lost a lot of time trying to figure it out. Lesson learned #1: have MacBeath Hardwood deliver the full sheets, and only cut them once the final cuts are set.
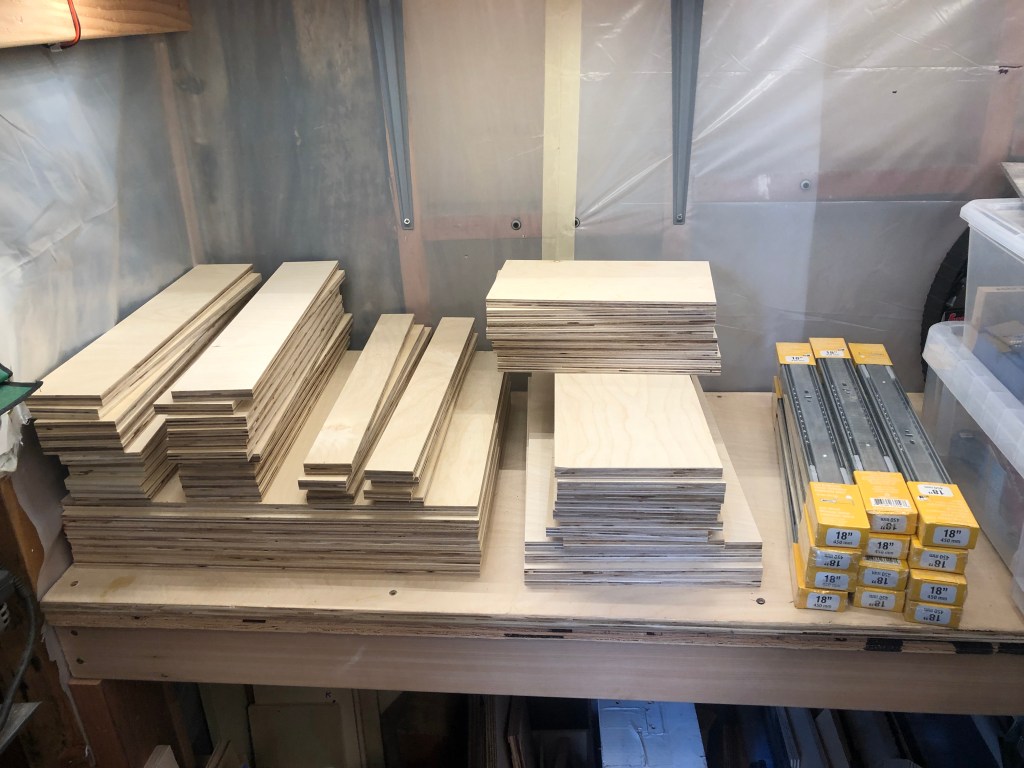
The upside to all the cutting-at-once is that the pieces are regular. The downside is that if I misunderstood a dimension, or if I change my mind about the joinery or some other build aspect, the cuts are wrong, creating more waste. Of course both happened: I ended up with several different kinds of joinery, and the cuts were wrong. There was a lot of waste.
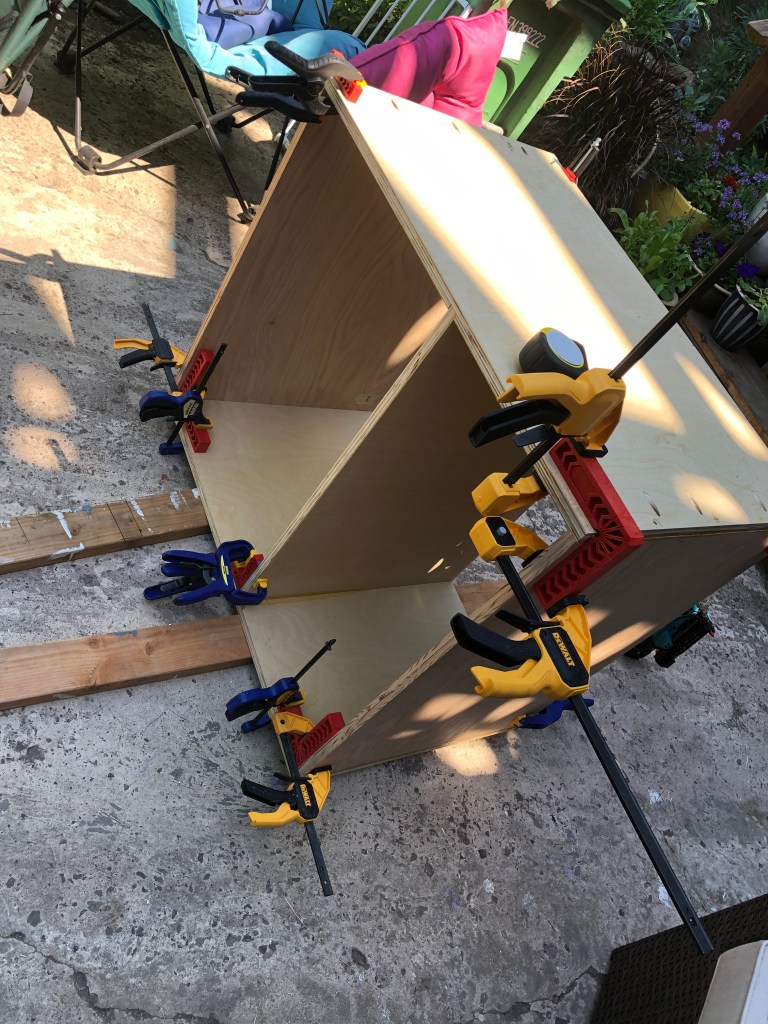
To build the carcase, I just used butt joints. My theory is that the primary weight is on the drawers which will tend to pull the sides and divider down and together. They’re 3/4" plywood, and there’s a 1/4" ply back panel providing rigidity. Everything is glued, pinned, and then screwed through the butt joints. (Ignore the pocket holes which were a screwup. It’s not nearly as rigid as I’d like, it’s got a little bit of flex around the middle axis (imagine that if you’re looking down at it, it can rotate slightly). Some reinforcement might be needed someday.

The original vision was a barely glorified-tray to hold the boxes. However, those looked terrible, and as I kept reading about drawer joinery, the butt joints didn’t seem strong enough: screws driven into the edge of plywood won’t grip well because they’ll tend to separate the plys. Furthermore, glue doesn’t adhere all that well to the plywood’s edges. I built one for completeness, with the 1/2" plywood bottom set inside the sides + front + back, glued, pinned, and screwed.

This looked terrible. For round 2, I tried using pocket holes to hold it together.

I built two drawers held together by pocket screws around the bottom (everything in the photo is 1/2" ply). I think these are strong, but I don’t like the Kreg pocket hole system. The drill guide itself was fine, but the ratcheting clamp system that is supposed to hold the guide against the wood constantly slipped. It was never tight, not once, so I created my own vise system. It worked, but it was a PITA.
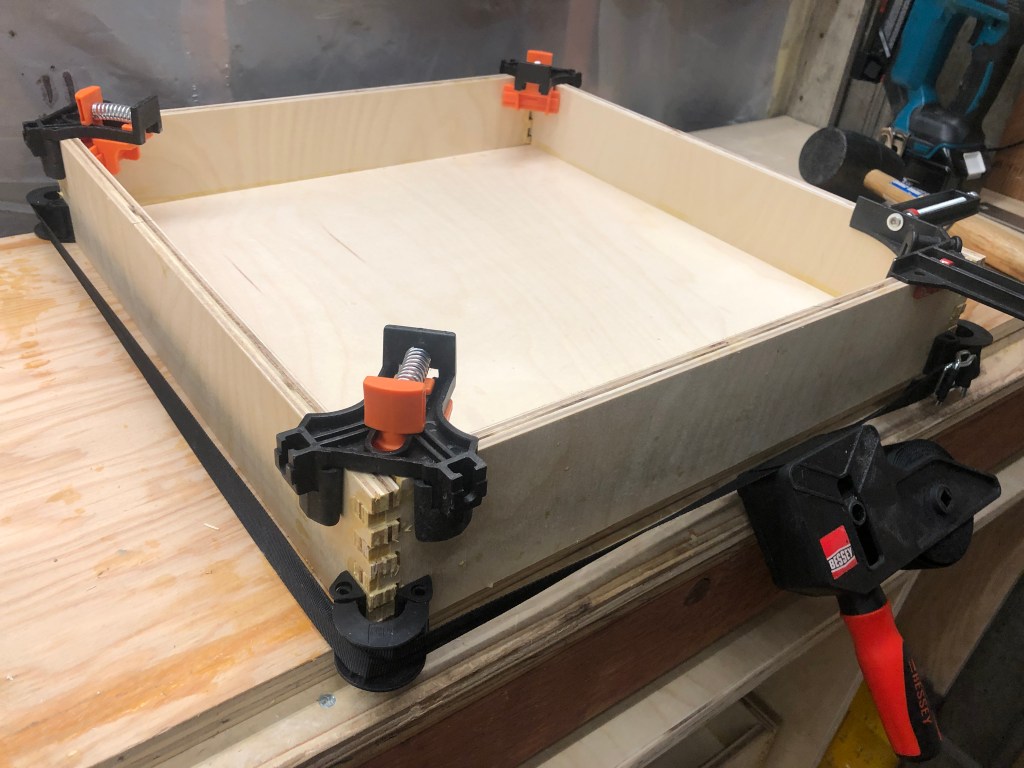
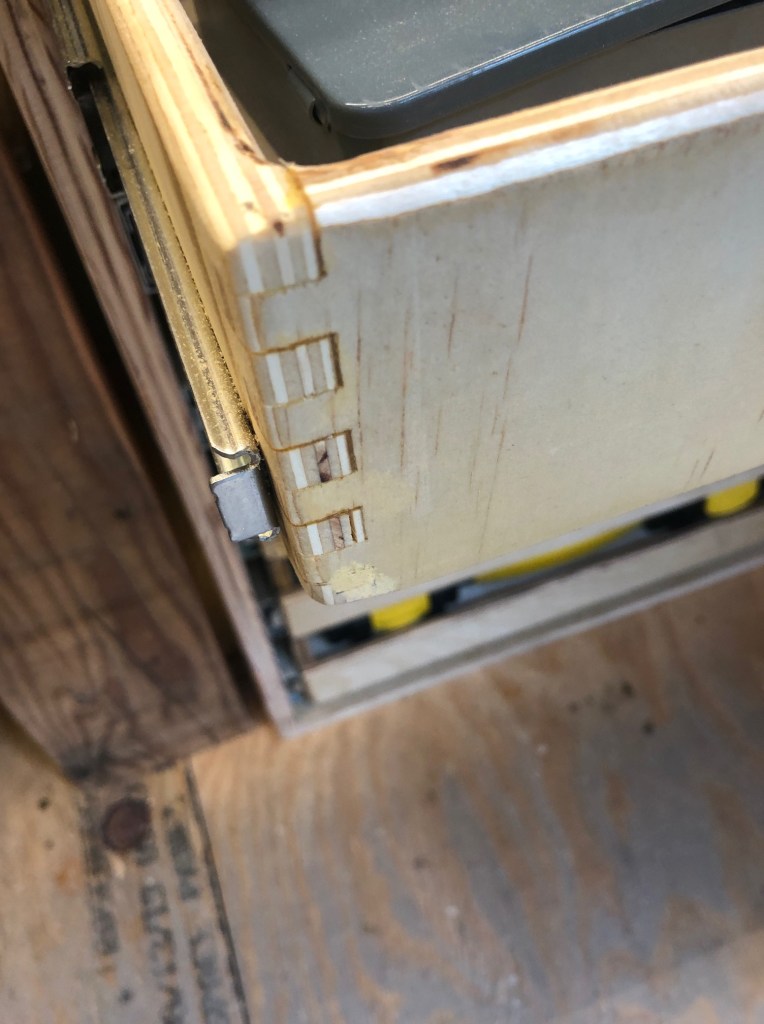
Next attempt: box joints. I found William Ng’s amazing system and followed it. I built the jig (twice, playing with it), and I made a couple of nice test pieces. Then I did four drawers. Findings: the jig tends to make a mess of the plywood, the dado blades tear out a lot on the back, even with tape or something else to try to reduce it, so many of the pins end up without veneer; any mistake in the jig setup amplifies through the cuts which can lead one set (say, the one with the pin on top) not to fit the other set (the one with the slot on top). I lost a few sets of sides + fronts this way, and it’s enormously frustrating. Also the amount of cutting is much larger than with other joints, the saw is very loud, and the dado creates a vast amount of sawdust. The pins didn’t fit together very well, so I ended up with a lot of wood filler in the joints. This is a very strong joint, and it’s cool looking, but it’s a lot of noisy, dusty work for an uncertain outcome.
Finally, I routed a dado slot 1/4" deep 1/4" from the bottom of the sides + front + back, and then slid a 1/4" piece of plywood into the slot for the drawer bottom. Glue everywhere, and spread with a brush. This was a good move, fitting the bottom like this helps the drawer stay square. The box joints make getting to square a little tricky. And the box joints make the final drawer dimensions a little bit of guesswork: how tightly will the joint parts fit together? How much space will the glue take up?
For the four narrower but taller drawers, I just used pocket holes from the sides into the front + back, and they worked ok. Not great, I have to say, because drilling the pocket holes was still a PITA. But with the dado slot for the 1/4" ply on the bottom, the drawers are square, and it was pretty easy to assemble and glue the drawers.
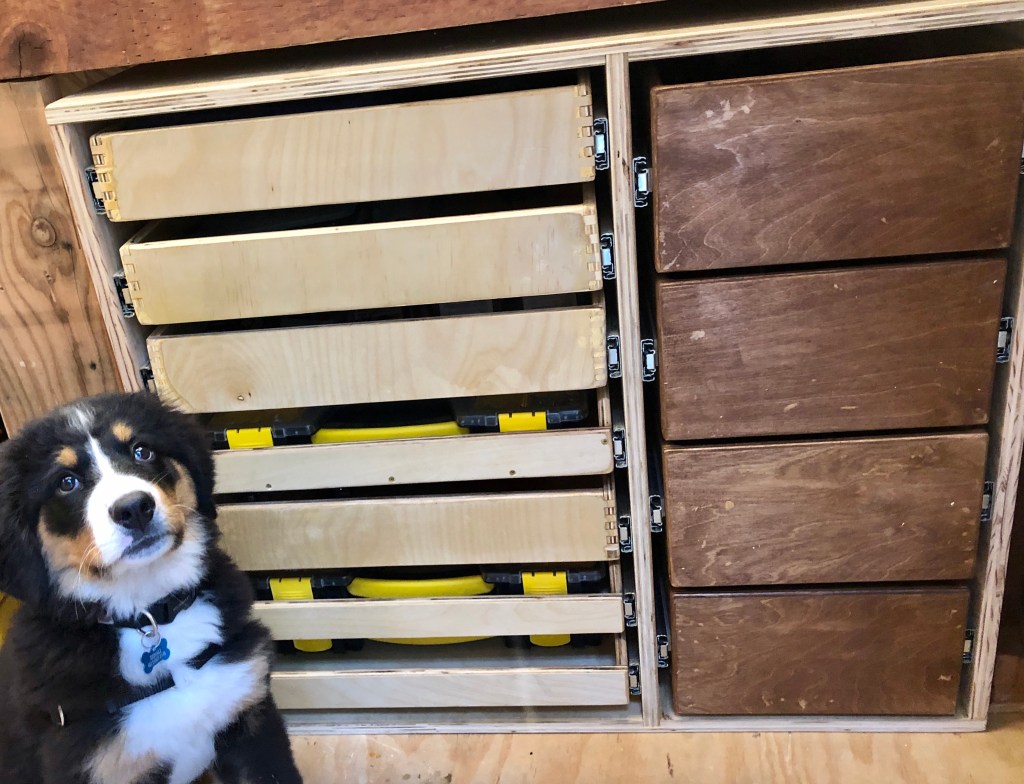

So I have a cabinet now — yay! And it really is a yay, notwithstanding the enormous effort for mediocre outcome. I’m still proud I did it, from never making a carcase or drawer, nor hanging one, to having a functional piece of furniture in about 3 weeks (including the week I was down with maybe-Covid).
The drawer slides from Lowes’s don’t suck, but they’re not fantastic. I had to fiddle with the drawers to get them to fit: some needed a very slight shave (I resawed the plywood sides on one drawer, took off 1/16"), some needed a shim (lesson learned #2: put the shim between the slide mount and the drawer, and put all the shims on the same side of the drawers so they vertically align). Even so, the drawers aren’t as smooth as I’d like.
For all the drawers, I flush trimmed all the corners with the router, then rounded over all the touch bits, then sanded a couple passes with 60, 150, 220. The fronts all got some shellac, and the right side drawers got stained before the shellac.

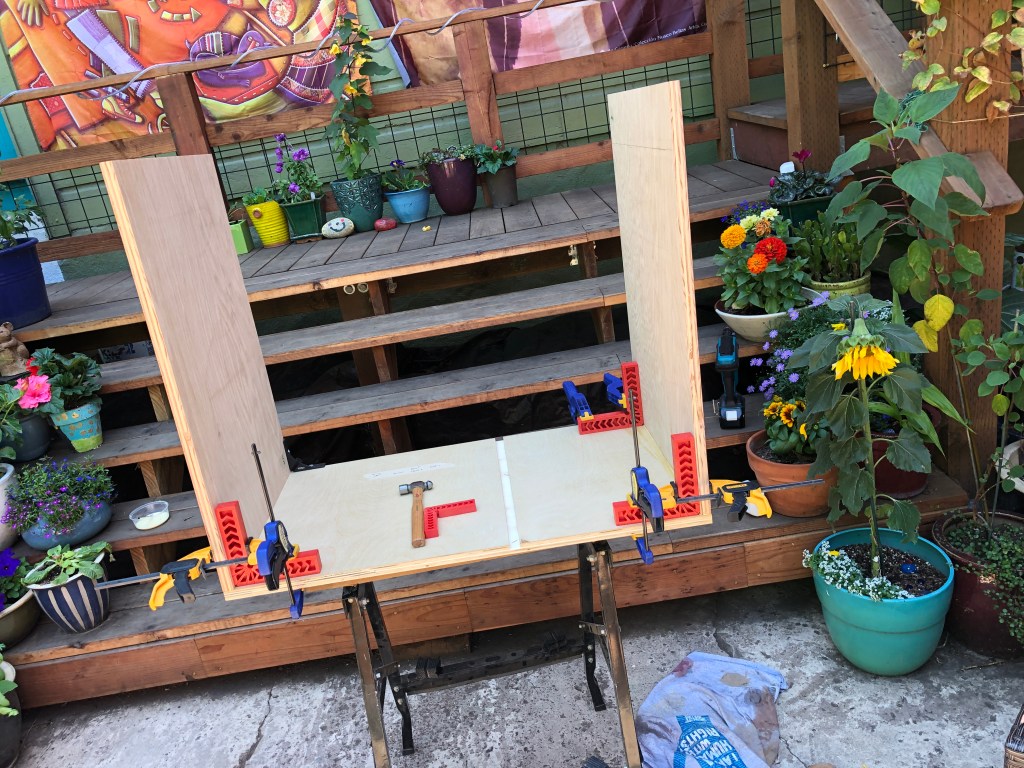
Last note: to install the drawer slides, I used plywood cut to the height inside the carcase I wanted the bottom of the slide. Then I clamped the plywood to the carcase and set the slide on top while I screwed it in. I played around a little with how the slide should attach to the drawer, but it’s a simpler bit of math than it seems. The keys are getting the slides equally spaced vertically on each side so left and right align; and getting the slides perpendicular to the carcase sides. The plywood is square so assures that the slides are parallel to the bottom of the carcase, and using the same plywood support on each side assures that the two sides are equally high. I was careful to cut the plywood an equal amount for each drawer, so I got equally-spaced drawers.
