
The grounds from the batteries go to all three GND wire snaps. From there, grounds also go to the two perf boards. The Arduino will also connect via ground leads to the ground rails on each perf board.
There are three DC positive systems: +12v, +5v, and charging, and each has a wire snap joining its components.
+12v power from the batteries first goes through a DPDT switch (so I can cut off the batteries physically) to the common pole in two relays (each battery to one relay). The relay’s normally closed (NC) pole connects to the +12v bus, and the NO pole connects to the charging circuit.
The +12v bus supplies the Arduino, a voltage sensor, a line to the pump (see below), and a voltage regulator.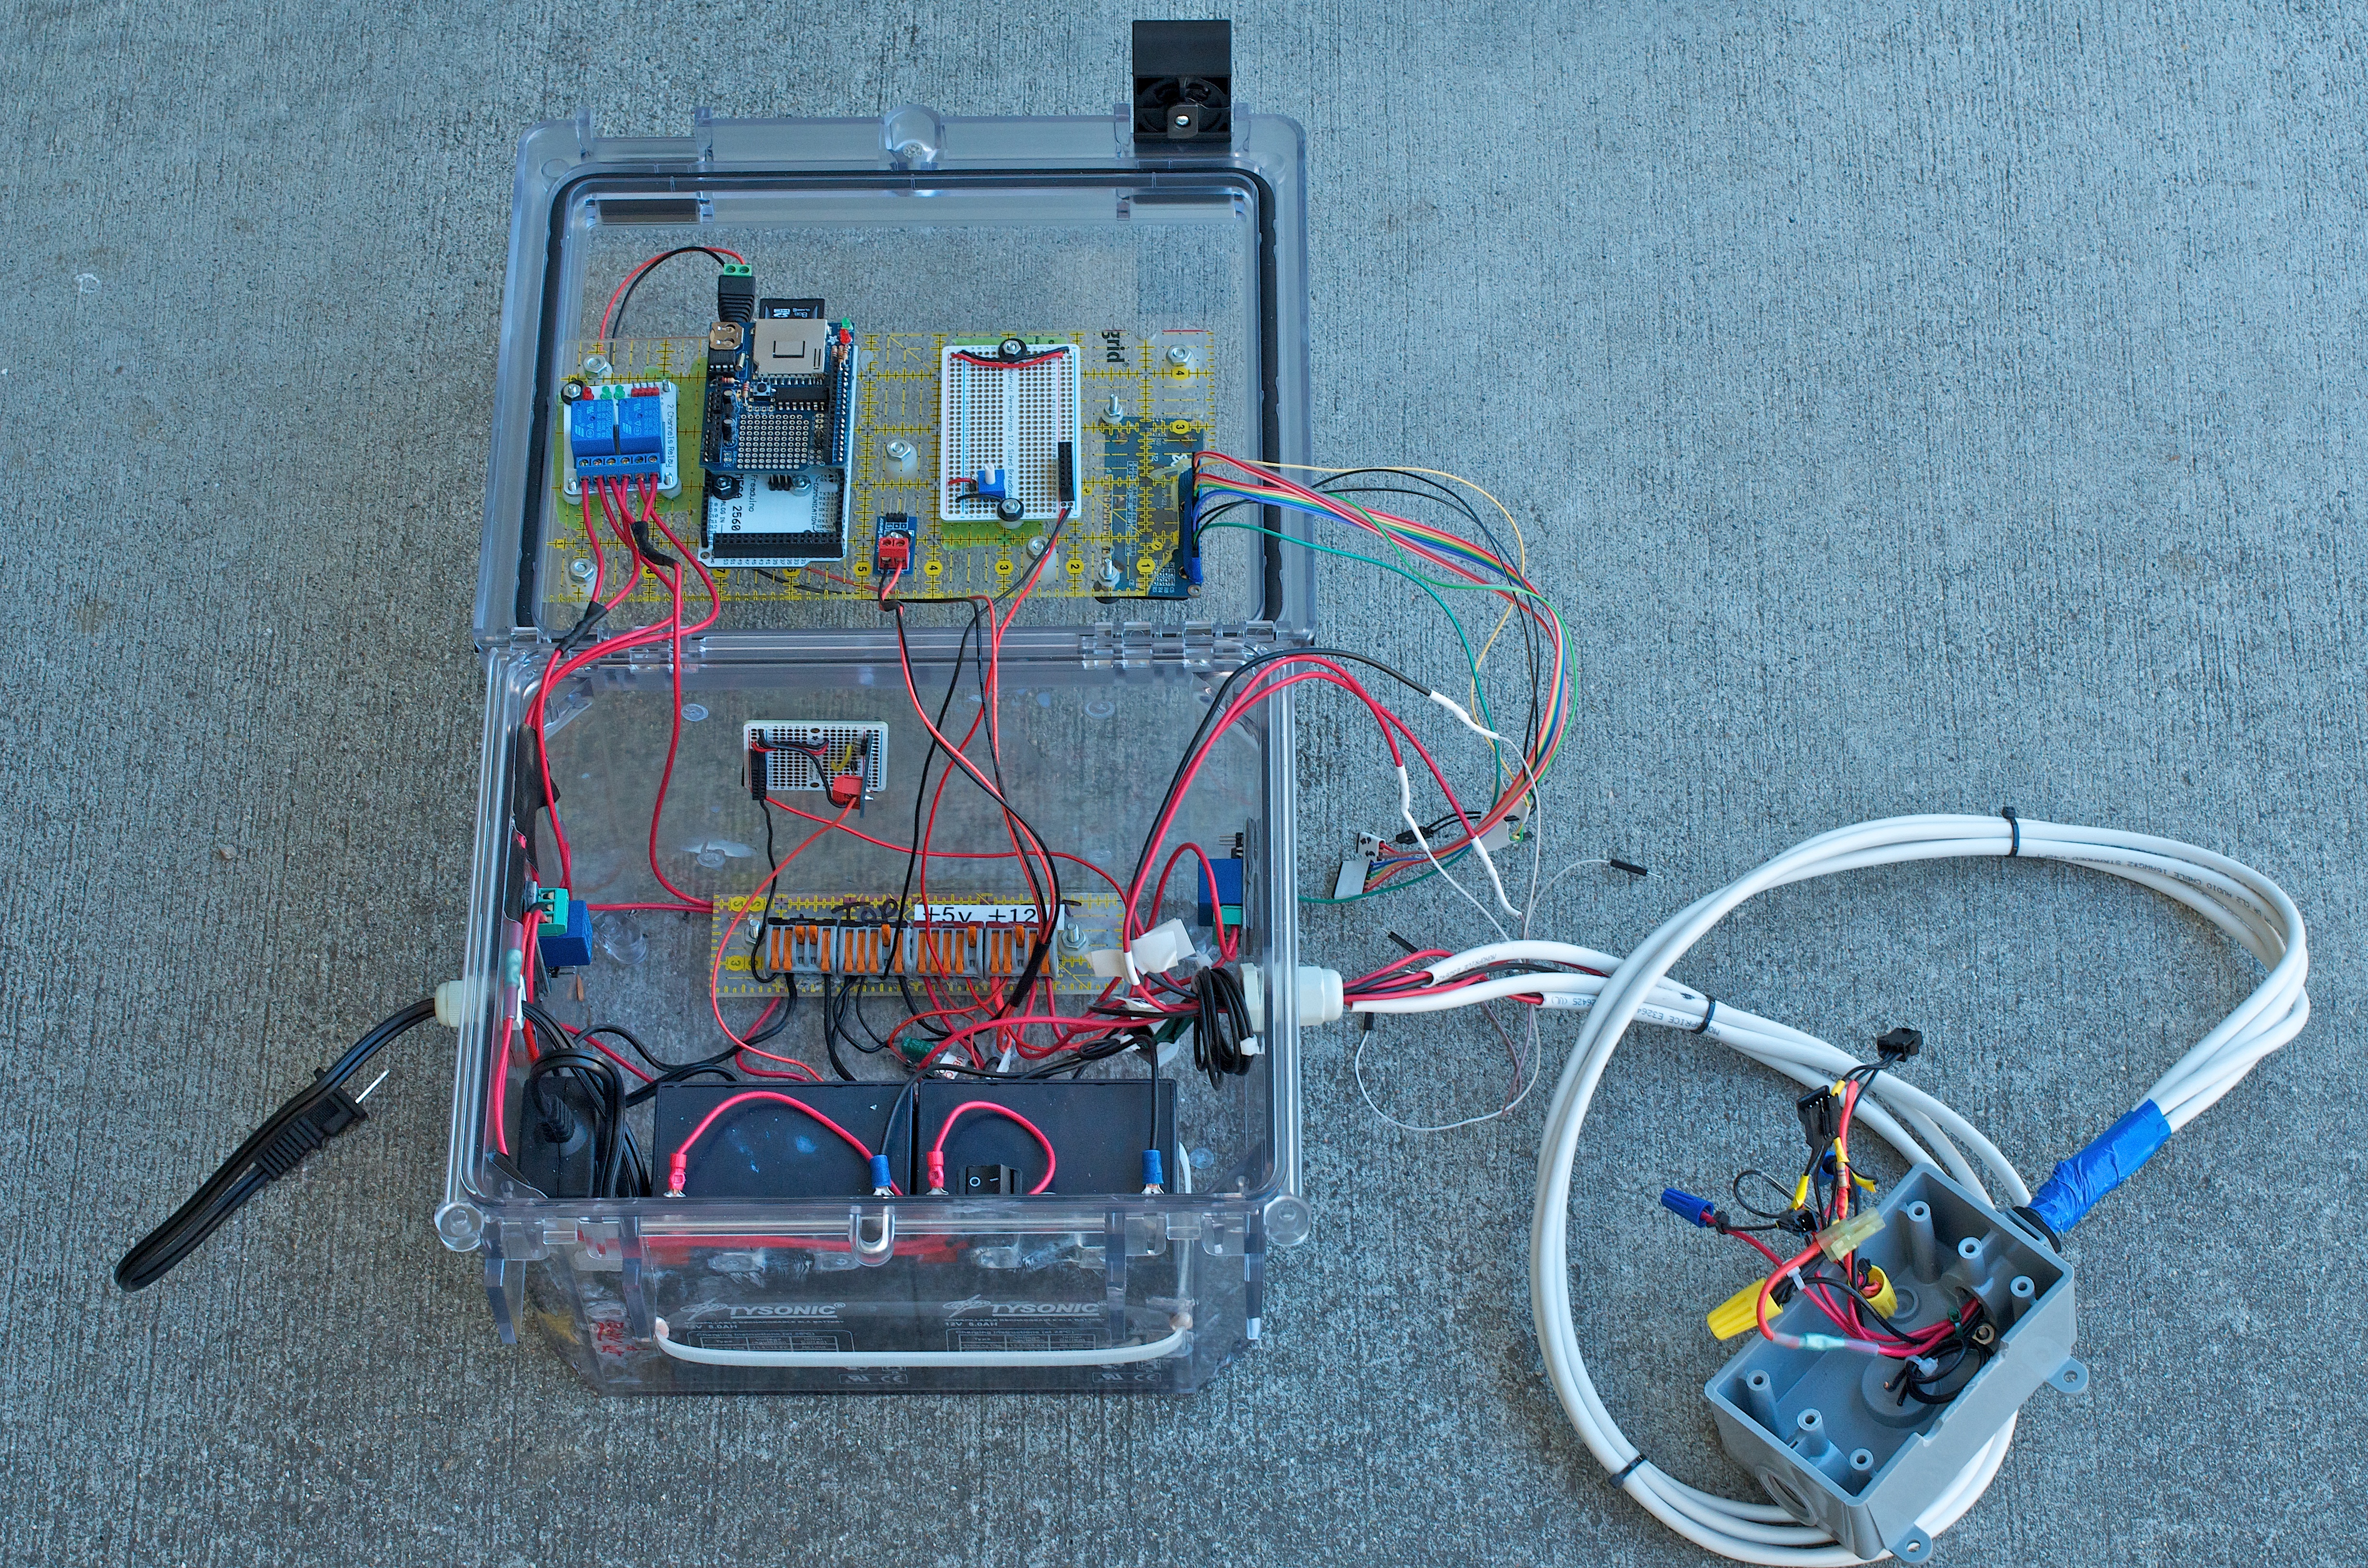
The voltage regulator supplies the +5v bus. This bus supplies power to the two perf boards, each of which has 8 F headers (for the sensors in the control box, and for the LCD). The +5v also connects to the +5v line for the junction box (for the sensors in the reservoir).
The +12v line for the pump goes through a current sensor and then to a relay which controls when the pump is on or off.
The charging circuit connects the leads from the batteries’ relays to the charger. There’s also a voltage sensor.
The logic: the Arduino can choose whether the batteries are connected to the +12v bus or to the charger. Of course, one battery has to be on the +12v bus all the time, or the Arduino will lose power. If it does, both batteries will revert to the bus anyway (the bus is on the NC pole of the relays), but the Arduino will reboot.
When one battery is connected to the charger, a voltage sensor will tell the Arduino how the charging cycle is going.
The +12v bus is monitored by a second voltage sensor, so the Arduino knows the level of the power in the system.
The Arduino can use the fourth relay to turn the pump on and off; whatever the pump draws is monitored by a current sensor.
Whew! And that’s before any of the logic wiring goes into place. Getting close, though.
